Blogging With Flask
Sunday, 23 February, 2020Objectives
Do you own your blog? If you have posted your blog on LinkedIn, Blogspot, Wordpress, Medium and the likes - I'd argue you don't fully own your blog! To me personally, ownership means many things
- You can write the blog using whatever tool you like (in my case it is my favorite text editor - vim)
- You can change the layout, the source code etc. on a whim!
- You can change the domain over which your posts appear.
- And more.
How do you achieve this? Well, it's not really hard if you already know how to write HTML and CSS. You just generate pages after pages in HTML and host them wherever you want to host them! But that is not efficient for a number of reasons:
- Wrestling with HTML tags takes away from the most important thing - focusing on your thoughts that are transferring from some deep part of your biological neural network through the fingers and onto the screen.
- You end up doing rather inefficient things such as copy-pasting the layout and navigation bar code from page to page.
- If you have a page that contains an index of your blogs, you end up making manual entries and further become prone to more errors.
What's the solution? If you knew a tool like Django or Flask (a web application framework) you could write simple programs to generate these pages in a more efficient manner. But if you want to host these applications in the public domain, you need a hosting service and that costs money! What if you could ask your web application framework to generate a static set of HTML pages that you could put anywhere you wanted? That's the best of both worlds - that's what Flask Frozen does. And if you want the liberating experience of writing a blog that you completely own and are willing to pay a little bit of price in terms of learning some new tech for it - you are reading the right tutorial!
NOTE: The working source code for this entire tutorial is available at the following Github repository.
Setting Up
Let's do the usual thing of creating a separate folder for our project and initialize our own virtual environment in it.
mkdir flask-blog-tutorial
cd flask-blog-tutorial
python3 -m venv venv/
source venv/bin/activate
pip install flask frozen-flask flask-flatpages
Just to clarify, we have installed three main packages in our new virtual environment
- Flask, the microframework used for building sites
- Frozen-Flask, the extension that generates static pages by analyzing our web application's views (functions responsible for producing a page or more technically an HTTP response for a given URL)
- Flask-Flatpages, this extension can convert Markdown documents into HTML pages. We are going to write our blog posts in Markdown, a far more convenient format than HTML.
Next, we are going to make two folders - one for our 'static' content - this includes any CSS files, images, JavaScript files and anything else that does not change; the other for our 'templates' which are blueprints for manufacturing our final pages.
mkdir templates
mkdir static
Basic Flask Application Setup
Here is the basic philosophy of desiging a flask application in a super condensed form.
- You initialize a
Flask()object, usually calledapp. - You define some 'view functions' and associate them with URLs. When this URL is visited, the corresponding function is executed and what is returned by this function is the response your browser or client receives.
app.run()starts a light weight HTTP server so that you can test your application without having to setup a full fledged production server.
Simple enough? Let's do this. Open a file called sitebuilder.py and add the
following code in it.
import sys

from flask import Flask, render_template

DEBUG = True

app = Flask(__name__)
app.config.from_object(__name__)

@app.route('/')
def index():
    return render_template('index.html')

app.run(host='0.0.0.0', port=5001)
What's happening here? We have done exactly what we mentioned in the basic
philosophy of how Flask works. The @app.route() decorator is binding the
function index() to the root URL /. And it will create a page using
index.html which we are yet to define.
Since the template files don't exist, the above code cannot work. Let's fix
this. Inside the templates directory we created earlier, create a new file
called base.html and write the following in it.
<!DOCTYPE html>
<html lang="en">
<head>
  <meta charset="UTF-8">
  <title> My Flask Blog</title>
</head>
<body>
  <header>
    <h1> My Common Header</h1>
  </header>

  {% block content %}

  {% endblock %}

</body>
</html>
This is your standard HTML syntax - nothing new here except for the {% block
content %} and {% endblock %} tags. This is part of the Jinja2 template
syntax which essentially is a way of saying "this is a block called 'content'
and we are going to replace it in the future with something else". This will
become clear immediately below.
Now, create another file called index.html. And place the following content in
it.
{% extends "base.html" %}

{% block content %}

<p> Welcome to my blog! Enjoy.</p>

{% endblock %}
Here is what we are saying here - the index.html will just look like
base.html except that the block 'content' will be replaced with whatever we
are putting in this file. This is called 'template inheritance'.
Do you see the power of this approach? Anything common to all pages on your
blog - the headings, the footers, the navigation bars, the CSS etc. can now be
placed inside base.html and the changes will reflect on all other pages so
long as they 'extend' this base.html. So, no more messy multiple changes when
you decide to change your layout or add a new navigation bar item.
Time to give this a spin. On your command line, say
python sitebuilder.py
Use your browser to visit http://127.0.0.1:5001/ and see your page in action!
If you feel like, try making changes to your HTML files and see what happens.
Blog Posts
Now, how do you write a blog post and make it accessible from a URL? We shall
tackle this now. Let's go to our sitebuilder.py and add the following lines.
from flask_flatpages import FlatPages

FLATPAGES_AUTO_RELOAD = DEBUG
FLATPAGES_EXTENSION = '.md'

pages = FlatPages(app)

@app.route('/<path:path>.html')
def page(path):
    page = pages.get_or_404(path)
    return render_template('page.html', page=page)
Let's dissect this carefully.
- First, we are giving some instructions to the Flask development server that should there be changes in our pages, they will be auto-reloaded.
- Next, that our pages will be stored internally with the extension
.md- so any other file with any other extension is not considered by Flask - By passing
appobject to theFlatPagesconstructor we are indirectly providing all the information about our app that is needed to locate the pages we create and render them. - We are defining a new view function which will be associated with all URLs that
read
something.com/abc.html. Theabcpart will be extracted and passed down to the view function. - Inside the view function, we take advantage of the
pagesobject constructed byFlatPagesto query for a page matching the namepath.
Phew! That's a lot. Let's dwelve a bit further. Let's temporarily modify our
page() function to say
def page(path):
    print("Page function running")
    page = pages.get_or_404(path)
    return render_template('page.html', page=page)
We have just added a print() statement to understand the workflow. Now, in
your browser type http://127.0.0.1:5001/first.html, you will get a 404 (Not
Found) error. This is expected. But check out the terminal - the message "Page
function running" should appear indicating that this function was correctly
matched to the URL. But since the page did not exist, a 404 response was
returned. So, let's fix that.
$ mkdir pages
Inside pages, create a file called first.md and type the following
\\ blank line
\\ blank line
# My First Blog

Here is some content for this blog. Written in Markdown.

- Bullet point 1
- Bullet point 2
- Bullet point 3
Note: The two blank lines at the top of the file are deliberate and needed.
Don't type the \\ blank line part - but keep the lines empty at the top of the
file.
And now, refresh our 404 exhibiting browser page. You should now get an error
saying TemplateNotFound. This means it has found the correct entry in the
pages object but was not able to find page.html file. So, here is the
lesson - the way we have setup things, an attempt to visit /first.html on our
site causes a search for first inside pages which in turn can exist only if
pages/first.md exists. Remember .md is because we configured
FLATPAGES_EXTENSION variable as .md.
It's easy to fix the TemplateNotFound error. Just create a page.html inside
templates directory and type in the following.
{% extends "base.html" %}

{% block content %}

{{ page.html|safe }}

{% endblock %}
Most of this should be clear now except the page.html|safe. This is what's
happening here.
pageis an object containing an attribute calledhtmlwhich stores the HTML code obtained by parsing the Markdown present in our filefirst.md.|safeessentially tells Flask (or Jinja) that this HTML is 'safe' - it does not need to modified in any way. (Else all tags will be ignored and converted to safe HTML representations and your blog post will contain HTML tags! Try removing and see what happens!)
Now, refresh our page in the browser again. And you should see your blog! Woohoo!
Blog Post Metadata
Actually, .md files are not pure Markdown files. They are special syntax files
which contain Markdown. This is why we had to put two empty lines at the top.
These two empty lines separate the metadata of the file from the actual content.
So, what we will do now is to modify first.md to read as follows.
title: My First Blog
date: 2020-02-23
category: general


Here is some content for this blog. Written in Markdown.

- Bullet point 1
- Bullet point 2
- Bullet point 3
Now, the three items - title, date and category are available as
attributes of the page object inside the page.html template. We can modify
the template to read as follows.
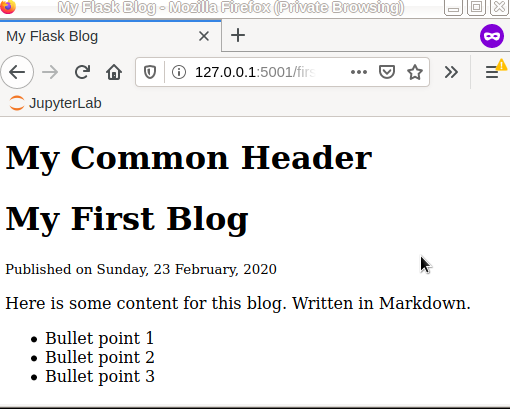
{% extends "base.html" %}

{% block content %}

<h1> {{ page.title }} </h1>
<small> Published on {{ page.date.strftime('%A, %d %B, %Y') }} </small>
<br>
{{ page.html|safe }}

{% endblock %}
See how we are now rendering the title of the blog using page.title. Also,
notice that we using strftime function available with Python datetime
objects for deciding how the date will be displayed. Below is a screenshot of
what the blog page would look like at this stage.
Great! You can now creating second.md, third.md and whatever else suits your
fancy inside the pages directory and access them using URLs such as
/second.html, /third.html. And more. If you are like me and like to
organize blogs in multiple categories, just create sub-folders inside pages
directory and the URLs will change to /subfolder/first.html and so on.
Freezing Pages
What we have done so far is to have a web application that is running functions according to URLs and these functions are responsible for generating the pages. But as mentioned at the beginning of the tutorial, hosting this application can be tricky. What we want to do is to deploy plain HTML pages. The process of converting 'dynamic' pages (which are generated on the fly) into 'static' HTML pages is what we call 'freezing' here. Let's do this.
Add the following lines to sitebuilder.py at suitable places.
from flask_frozen import Freezer
from flask import url_for

freezer = Freezer(app)

@freezer.register_generator
def pagelist():
    for page in pages:
        yield url_for('page', path=page.path)
Replace the app.run(...) line with the following piece of code.
if __name__ == '__main__':
    if len(sys.argv) > 1 and sys.argv[1] == 'build':
        freezer.freeze()
    else:
        app.run(host='0.0.0.0', port=5001)
Let's review the essential parts of this code.
- We are passing
appto Freezer - this allows it to fetch whatever information it needs about the app in order to do its job. - We are defining a function whose job it is to generate URLs for each post in
pagesobject. - And we are decorating with
freezer.register_generatorso that among the things Flask Freeze has to freeze, this will include all our pages. - Finally, we give two modes to our
sitebuilder.pyapplication - one where we run it simply by sayingpython sitebuilder.pyand we can use this to see how our pages look like as we change them in real time. And another mode where we require that our new set of static pages be generated.
To see the freezing in action, terminate the development server if running and type in the following command.
$ python sitebuilder.py build
Ignore the warnings that appear. Head to the build folder and you will find
the HTML pages generated there! Job well done.
Publishing Your Blog
If you take all the files inside build and place them where the root folder of
your site is configured, it's done - you have published your blog!
If you don't have a hosting server with a document root configured for you, here is what you can do
- Register or Sign In to your Github account.
- Create a new repository called
<yourUserName>.github.io - Add your
build/files inside this repository (see Git and Github help manuals for learning how to do this.) - Done!
Visiting <yourUserName>.github.io should display your pages.
Bonus Material - A List of All Blog Posts
While not a part of the original goal laid out at the beginning, let us cover
something which is obvious - having a list of all your posts displayed on the
index.html page.
Change the index() function to the following:
@app.route('/')
def index():
    return render_template('index.html', pages=pages)
And add the following to your index.html.
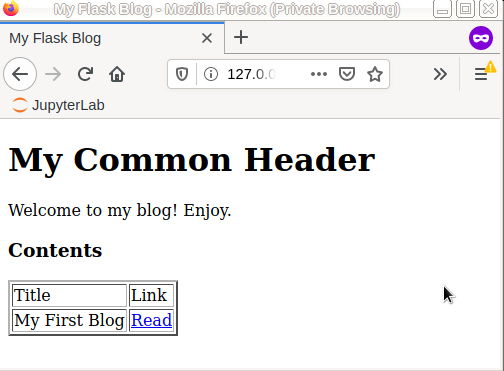
<h3>Contents</h3>
<table border="2px">
  <thead>
  <tr>
    <td> Title </td>
    <td> Link </td>
  </tr>
  </thead>


  {% for page in pages %}
  <tr>
    <td> {{ page.title }}</td>
    <td> <a href="{{ page.path }}.html"> Read </a></td>
  </tr>
  {% endfor %}

</table>
What did we do?
- We modified our
index()view function to pass thepagesobject to the template. - In the template, we loop over the
pagesobject and populate table rows containing the blog post title and a hyper link. Note that since the path does not contain.htmlinside it, we add it manually.
Below is a screenshot of what the index page looks like, assuming a single blog post.
Proceeding Further
There is much more hard work that needs to be done to achieve a fully functioning and ready to publish blog. Here is what I recommend as future course of action.
- Style it up. I recommend using something like "Bootstrap" to get the best possible look. Or you could explore some ready made templates.
- Learn more about Markdown syntax since you will be writing blog posts in Markdown.
- Look at Disqus as a means of adding a "Comments" section to your blog posts. The way this works is that you create an account with Disqus, follow their instructions in adding a Javascript to your blog page and Disqus does everything else. It does require a unique identity for each page to separate out the comments - you will need to code a bit to generate this unique ID.
- Look into something like Google Analytics to get visitor statistics for your pages.
- Look into RSS feeds to enable users to subscribe to your blog.
NOTE: The working source code for this entire tutorial is available at the following Github repository.